Let’s Be Honest: How Much Does a Domestic Cleaner Cost Per Hour in London in 2025?

A woman in a garden flat on Elderfield Road in Clapton asked me last spring why our quote was £24 an hour when the card in the newsagent’s window on Chatsworth Road said £13. Fair question. Nobody in this trade answers it properly, because the honest answer involves telling you what we pay our cleaners, what we keep, and what the £13 card is quietly leaving out. So here is the whole thing, with the arithmetic showing.

What is the going rate for a domestic cleaner in London in 2025?

Two markets, two sets of numbers, and they barely overlap.

An independent cleaner working for herself, paid directly, is charging somewhere between £15 and £20 an hour across most of Greater London this year. An insured company with vetted staff sits between £20 and £28, with the middle of that band – call it £22 to £25 – doing most of the volume for regular weekly and fortnightly work. One-off cleans run higher than regular contracts at nearly every firm, usually by £2 to £5 an hour, because a first visit to an unknown property takes longer per room and carries no guarantee of a second booking.

Below £14 an hour in London you are looking at cash work with no insurance and no cover, and the person doing it is taking home less than the London Living Wage after their travel. Above about £35 for standard housekeeping, you are paying for a brand rather than a clean.

Why the independent looks cheaper than she is

The £15 an hour independent is a good deal when it works. She keeps every penny, you get the same person every week, and there is no office taking a cut. The failure modes are the problem. She gets flu, and your kitchen waits ten days. She drops a Le Creuset through a glass hob and there is no public liability policy behind her, which means the claim is a conversation between you and her, and neither of you wants that conversation. She goes back to Bucharest for a month in August. HMRC, meanwhile, takes the view that if you set her hours and supply the equipment, you may be her employer, with everything that follows.

Where does the money go when you pay £24 an hour?

This is the part firms leave vague, so let me lay a single hour out.

The London Living Wage went to £14.80 an hour from May 2025, and any company worth booking is paying at or above that – some pay £15 to £16 for experienced cleaners with a long client list. Employer National Insurance and pension contributions add roughly 15 to 18 per cent on top of gross pay for employed staff. Holiday pay is another 12 per cent of hours worked, and it is a legal entitlement, not a gesture. That is £19 to £20 of a £24 hour gone before anyone has bought a bottle of degreaser.

Then: public liability and employer’s liability insurance, DBS checks at around £20 a head plus admin time, uniforms, microfibre stock, machine servicing, cover cleaners for sickness, and the office hours spent rescheduling when a client cancels at 8pm on a Tuesday. That’s the arithmetic. A well-run domestic cleaning company in London operates on a net margin in the region of 5 to 10 per cent, which is thin enough that a single bad debt swallows a month.

Any firm quoting you £18 an hour inclusive of VAT, with insured, PAYE, Living Wage staff, is either subsidising your clean from somewhere else or is not doing one of those things. The sums do not permit a third option.

The hour nobody bills you for

Travel. A cleaner doing two three-hour jobs a day in Zone 3 spends between 60 and 90 minutes moving between them, unpaid in most self-employed arrangements and a real cost in employed ones. It is why cleaners cluster: once someone has four clients within a fifteen-minute walk in Stoke Newington, she will turn down a better-paid job in Uxbridge without hesitating. If you live somewhere awkward to reach – and there are large parts of outer south-east London where the bus is the only realistic option – you are competing against that convenience, and it shows up in your quote.

Why does the same clean cost more in Clerkenwell than in Hornchurch?

Zone 1 and inner-London jobs carry costs that outer-borough jobs do not, and they are stubbornly specific rather than vague “central premium” talk.

Parking. A permit-only bay in a Camden or Kensington street means either a visitor permit you supply or a meter at £4 to £7 an hour, which on a three-hour clean adds more than the hourly rate difference on its own. The Congestion Charge is £15 a day for anyone driving into the zone between 7am and 6pm on a weekday. Vans need ULEZ compliance, and a non-compliant older van is £12.50 daily on top.

Then there is the building. Fourth-floor Victorian conversion in Crouch End with no lift, and a cleaner is carrying a vacuum up 68 stairs twice a day. Mansion block in Marylebone with a porter who requires signing in, a service lift booked in advance, and a rule against using the front entrance with equipment. Twenty minutes gone before the first surface is touched.

What size of home buys what

A one-bedroom flat wants two hours for a proper regular clean, and two hours is the minimum booking at most London firms because anything shorter cannot absorb the travel. A two-bed flat sits at two and a half to three. A four-bed family house in Tooting or Ealing needs four to five hours weekly, and people routinely try to buy it in three, then wonder why the skirting boards never get done. Hours buy tasks. Squeeze the hours and you are choosing which tasks get dropped – you just are not choosing consciously.

When is paying by the hour the wrong way to buy cleaning?

For regular housekeeping, hourly is fine and fair. For everything else it is a poor deal for you, and I will say that knowing full well that hourly billing suits us better.

A deep clean, a post-builders clean, an end-of-tenancy – these should be quoted as a fixed price against a defined scope, viewed in person or by video where the job is big. Hourly billing on a one-off pays us for being slow. Fixed pricing pays us for being good, and it hands you the risk transfer: if the oven takes ninety minutes rather than forty because someone has been grilling in it since 2019, that is our problem, not an extra £30 on your invoice.

The trap in a “from £X” price

Advertised rates that begin with “from” are built around the easiest job on the books – a compact flat, ground floor, off-street parking, client supplies the products. Read three lines down and you find products at £5 a session, a two-hour minimum, and a different rate for one-off work. That’s the arithmetic that turns an advertised £17.90 into £24 by the time it lands on the card, and the firm has told you no lies at any point.

Ask for the scope in writing. Not “deep clean of kitchen” but a list – inside the oven, inside the fridge, inside cupboards, extractor filter degreased, limescale off the tap bases, tile grout treated. The gap between two quotes for the same-sounding job is nearly always a gap in what is included, and that is the gap that catches people out on end-of-tenancy work, where the difference between a £220 quote and a £380 quote is usually carpets and windows.

What does a £13 an hour rate cost you later?

Sometimes nothing. There are excellent cleaners charging under the market because they undervalue themselves, they work near home, and they have no overheads. If you have found one, keep her and give her a rise before someone else does.

More often the low rate is funded by something being absent. No insurance means you carry the loss on a scratched worktop or a flooded flat below. No cover means the weeks you go without. No employment status means an HMRC exposure that most households have never thought about. And the churn is punishing: a cleaner earning £13 in London is one bad month from leaving the trade, so you retrain a stranger on your house twice a year.

Here is the question I would ask any agency, including ours: what proportion of my hourly rate reaches the person doing the work? A firm charging £26 and paying £13 is running a 50 per cent margin on someone else’s labour, and there are several operating across London doing exactly that behind good websites. A firm charging £24 and paying £15.50 with holiday pay and NI on top is running a normal business. Both quote you a similar-looking number. Only one of them will still have your cleaner in six months. That’s the arithmetic, and anybody who deflects the question has answered it.

The questions worth asking before you book

Are the cleaners employed or self-employed, and what is the hourly rate they receive. Is public liability insurance in place and to what value. Is the quoted rate inclusive of VAT. Are products and equipment included or is it £5 a visit extra. What happens when my cleaner is ill – is there cover, and will she be briefed on my home. What is the minimum booking, and does the rate drop for weekly rather than fortnightly.

Five minutes of that on the phone will separate the firms who have thought about their pricing from the ones who picked a number that looked competitive on Google.

The woman on Elderfield Road went with us at £24. She also kept the newsagent’s card, and told me she rang the number twice and got no answer either time.

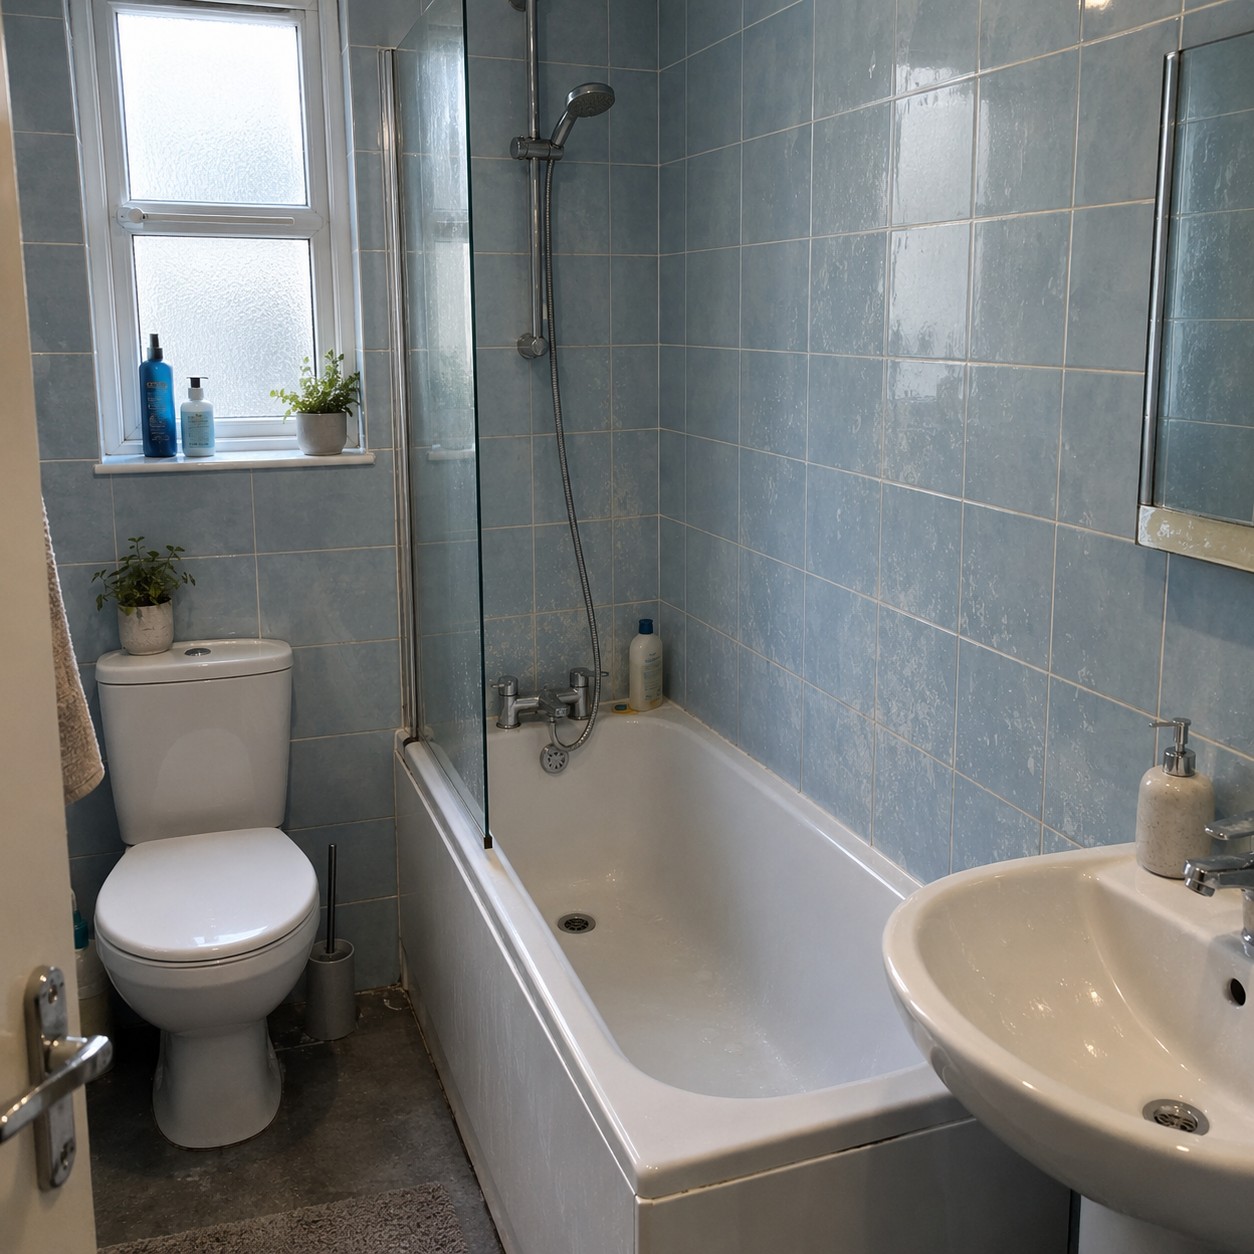
Standard London bathroom with signs of limescale on the wall tiles
How to Clean Limescale Off Bathroom Tiles and Grout in Hard-water London

The bathroom on Fordwych Road in Cricklewood had a chalky bloom over every tile from the bath rim up to shoulder height, and the tenant had spent three weekends on it with a cream cleaner and a green scourer before she rang us. She had taken the shine off four tiles near the mixer. The bloom was still there. That is the standard outcome when someone attacks a mineral deposit with abrasion and optimism, and it happens in thousands of London bathrooms a year, because the water that comes out of the wall in most of this city is hard enough to write on glass with.

Why does London water arrive at your tiles already loaded with mineral?

Rain falls soft on the chalk of the Chilterns and the North Downs, soaks down through it, and picks up dissolved calcium and magnesium carbonate on the way. That groundwater, plus abstraction from the Thames and the Lee, feeds most of Greater London. By the time it reaches a shower head in Herne Hill or a basin tap in Pinner it can carry well over 250 milligrams of calcium carbonate per litre. Classification varies by who is printing the leaflet. The practical answer does not: it is hard, and in some outer boroughs it is very hard.

Heat it, atomise it through a shower rose, throw it at a vertical surface. The water leaves. The mineral stays behind and crystallises, and because it forms in place rather than landing as dust, it grips the glaze and the grout with something closer to a chemical bond than a smear.

What the hardness figures mean once they hit the wall

Water companies publish hardness by supply zone, and it is worth looking yours up before you buy anything. A flat in Chiswick and a flat in Orpington can be on noticeably different figures. What the number tells you in practice is dwell time – how long an acid needs to sit before the deposit gives up. On soft-ish supply you might be looking at five minutes. On a 320 mg/l zone in the far south-east, closer to twenty, with a second pass.

How do you tell limescale from soap scum, and does it matter?

It matters more than anything else in this article, because the two respond to opposite chemistry and half the failed cleaning jobs I get called into are failures of identification.

Limescale is calcium carbonate. It is white to grey, slightly translucent, and it builds in a pattern that follows water: fans of spray around the shower, tide marks at the bath waterline, a hard collar at the base of the tap. Run a fingernail across it and you feel a raised edge, like dried candle wax. Put a drop of white vinegar or lemon juice on it and watch closely – you should see a fine fizz of carbon dioxide within thirty seconds. That’s the tell.

Soap scum is a different animal entirely. Calcium and magnesium in the water react with fatty acids in soap and shower gel to produce an insoluble metallic soap, which is why bar soap in hard-water London leaves that grey-white greasy veil that traps everything else. It does not fizz. It feels waxy rather than gritty, and it smears when you wipe it – that’s the tell for scum, and it responds to an alkaline degreaser or hot water and detergent, not to acid at all.

Then there is the third thing people lump in with both: black or pink growth in the grout lines and along the silicone. Black is usually Cladosporium and its relatives feeding on the soap-scum film. Pink is Serratia marcescens, a bacterium, and it lives on the same food source. Neither is scale. Neither will shift with citric acid.

In real bathrooms you get all three layered on top of each other, which is why single-product approaches disappoint. The scum sits over the scale. Acid cannot reach the carbonate through a waxy fatty layer, so the acid appears not to work, so the customer buys a stronger acid and still gets nowhere, and eventually reaches for the scourer that killed the glaze on Fordwych Road.

The order that works

Degrease first, descale second. Hot water, a good alkaline bathroom detergent or even a diluted washing-up liquid solution, a nylon pad, and take the greasy film off. Rinse. Then apply your acid to what is left. On a shower enclosure in a serviced flat off Nine Elms Lane that we service fortnightly, that two-stage sequence takes about eleven minutes and gets glass that a single-stage attack could not reach in forty.

What shifts limescale off glazed tiles without wrecking them?

Acid, dwell time, and something to hold the acid against a vertical surface. All three, or you are wasting the afternoon.

For domestic work I use citric acid powder made up at roughly one part to ten in warm water, or white vinegar neat on lighter deposits. Warm helps – it speeds the reaction noticeably. Sulphamic acid is stronger and is what most commercial descalers are built around; it works, it is cheap, and it deserves gloves and open windows rather than casual use.

The holding problem is the one people skip. Spray goes on a wall and runs to the floor in eleven seconds, taking your dwell time with it. So we lay it on with paper towel or a cut-up microfibre pressed flat to the tile, saturate that, and leave it. Ten minutes for a domestic shower wall in a hard zone. Come back, lift the towel, work the area with a white nylon pad, and the deposit should come away as slurry. If it comes away as chalk dust instead, the towel went on too dry. That’s the tell for a bad dwell, and the fix is more liquid rather than more force.

Metal scourers, wire wool, and pumice sticks have no place on ceramic glaze, chrome, or acrylic. They will take scale off, and they will leave a matt scatter of micro-scratches that grabs mineral harder next month than it did last month.

Where acid must never go

Marble, limestone, travertine, terrazzo, and most polished concrete are calcium carbonate themselves. Put a descaler on them and you will etch a dull patch that no amount of cleaning brings back – it needs re-polishing. A lot of the newer bathrooms in Bloomsbury conversions and the Kensington rental stock are stone or stone-effect porcelain, and the two are hard to tell apart when wet. Test in the corner behind the loo.

Never combine an acidic descaler with a chlorine bleach product. Not in the same bucket, not one after the other on the same tile without a thorough rinse between. That mixture releases chlorine gas, in a small room, with the door shut. People have been hospitalised doing exactly this while trying to be thorough.

How do you get scale out of grout without scrubbing it into powder?

Cement grout is porous, mildly alkaline, and softer than everything around it. Long acid contact will erode the surface and leave you with sandy, crumbling lines – which is why I keep grout dwell shorter than tile dwell and rinse harder afterwards.

Work along the line, never across it. A stiff nylon grout brush, the narrow kind, held at a low angle, running the length of the joint. Cross-scrubbing puts pressure on the shoulders of the joint where it meets the tile edge and that is where grout fails first.

Sequence for a bad one: degrease the whole area, apply diluted acid to the joints for four or five minutes, agitate along the line, rinse thoroughly with clean water. If black staining remains after that, it was never scale, and the answer is an oxygen bleach paste – sodium percarbonate mixed to a thick slurry, left twenty minutes, brushed and rinsed. Chlorine bleach whitens the surface without killing much below it, and the growth returns in a fortnight looking exactly as it did.

When grout has gone past cleaning

Some grout is finished. If the joint is cratered, if it releases sand under a fingernail, if there are voids where a section has fallen out, no cleaning method will make it look uniform, and I will say so on the quote rather than take money for three hours of work that produces a slightly cleaner ruin. Raking out and regrouting a standard shower enclosure is a half-day job for a tiler and it resets the bathroom for a decade. Silicone the same – mouldy silicone gets cut out and replaced, never bleached repeatedly.

What stops it coming straight back in a hard-water borough?

A squeegee by the shower, used for thirty seconds after every use, does more than any product on this page. Remove the water and the mineral has nothing to precipitate from. It sounds trivial. It is the single biggest difference between the bathrooms we descale twice a year and the ones we descale every visit.

Here is the part that costs me work, and I will say it anyway: if you own your home in one of the hard boroughs and you are paying a cleaning contractor to fight scale month after month, buy a water softener instead. An ion-exchange unit fitted under the sink runs somewhere in the high hundreds to low thousands installed, plus salt. It will pay for itself against our invoices, your kettle, your washing machine element, and your combi boiler within a few years, and your tiles will stop growing a crust. Plenty in this trade would rather you did not know that. Scale removal is repeat revenue and it is dependable revenue.

What to do if the plumbing is not yours to change

Second best, if you are renting and cannot alter the plumbing: a shower head with a removable face that you can drop in a jug of citric acid solution once a month, and a bathroom that gets ventilated properly after use – extractor running fifteen minutes past the end of the shower, window open where there is one.

On the Fordwych Road flat we degreased, laid citric acid on paper towel across the whole wall, waited, and took it off in two passes. Ninety minutes for the room. The four tiles she had scoured stayed dull, and they will stay dull until someone replaces them.

How to Clean and Prepare Your Home for a Romantic Dinner Night

Planning a romantic dinner night at home can create unforgettable memories with your partner. Achieving the perfect atmosphere goes beyond just the meal—setting the mood, tidying up your space, and crafting a visually appealing dining area.

From selecting the right menu to incorporating personal touches, every detail matters. This guide will take you through the essential steps to transform your home into a romantic haven, ensuring your evening is one to remember.

A dinner table set for a romantic evening at home

Setting the Mood for a Romantic Dinner Night

Setting the mood for a romantic dinner at home is about mixing ambience, thoughtful details, and shared experiences to create that cosy, intimate vibe. Soft lighting and the right music can make a difference.

Picture dimming lights, the gentle flicker of candles, and a table dressed up with beautiful flowers and elegant crockery. This is where memories are made and relationships are strengthened.

Combining comfort with a touch of creativity allows you to turn your dinner night into a cherished moment you both will remember.

Creating a Romantic Atmosphere

Creating a romantic atmosphere is about the little details that spark love and intimacy, turning your home into a cosy haven. You can set the mood by incorporating soft lighting, inviting scents from candles or fresh flowers, and little romantic gestures that enhance the vibe.

To take things up a notch, consider adding some plush textiles—think velvety cushions and soft throws—that just beg to be cuddled with. And don’t forget a curated playlist of soft melodies; it can harmonise beautifully with the space and set the tone for those tranquil moments of connection.

Dimming the lights to a soft glow can instantly transform the mood, creating a gentle ambience that encourages deep conversations and shared laughter. Whether you’re whipping up an intimate homemade dinner or having a film night under a pile of blankets, these layers of comfort and intention create a magical space for closeness, where every little detail speaks volumes about affection and care.

A beautifully prepared table with candles

Cleaning and Decluttering Your Home

Cleaning and decluttering your home is essential when preparing for a romantic dinner. A tidy space helps create that calm and cosy atmosphere.

Before the evening begins, take a little time to ensure your living room, dining area, and kitchen are looking inviting. A cleanliness checklist can be your best friend, keeping you organised as you tackle surface cleaning, dusting, vacuuming, and neatly arranging everything.

Not only does this improve the overall appearance of your home, but it also sets the perfect stage for a fun and intimate experience.

Areas to Focus On

When you’re getting your home ready for a romantic dinner, a few key areas need your attention to create a well-organised and inviting space. Start with some surface cleaning in the kitchen, dining area, and living room—these spots are the heart of your dinner night. A clean kitchen makes cooking a breeze, and an organised dining area sets the perfect mood for a delightful meal.

Don’t forget to tidy up any clutter in the living room; it’ll help create a more serene atmosphere for conversation and togetherness.

By prioritising these spaces, you can enhance the overall dining experience. A thorough cleanliness checklist can be your best friend here, ensuring nothing slips through the cracks. Make those surfaces spotless, and clear away any dust or grime. This attention to detail looks good and creates a comforting vibe.

An organised layout makes it easier to navigate your space, leading to smoother interactions. All these little efforts add up, contributing to the magic of the evening and letting everyone focus on what truly matters: enjoying each other’s company.

Preparing the Dining Area

Preparing the dining area is key to creating a stunning, inviting atmosphere that enhances your romantic dinner experience. A well-arranged table with elegant cutlery, romantic décor, and a beautiful tablecloth captivates your partner and sets the mood.

Think about the colours and textures in your table arrangement; they should align with the romantic theme you’re going for. The right table setting elevates the meal and shows your partner just how much you care.

Table Setting and Décor

Table setting and décor are key to creating an enchanting dining experience that your partner will remember.

The atmosphere you craft with carefully chosen elements can turn an ordinary meal into a romantic evening. Consider adding textures like a linen table runner or intricately patterned napkins to bring depth and interest to your setting. Selecting a harmonious colour palette—perhaps soft pastels or rich jewel tones—really enhances the table’s visual appeal. Don’t underestimate the power of glassware either; crystal or decorative glasses can reflect light beautifully and elevate your presentation.

And if you weave in some subtle romantic gestures, like handwritten menu cards or small tokens, the ambience will feel intimate and unforgettable. This way, you create a space where you feel cherished and unique throughout the evening.

Choosing the Perfect Menu

Choosing the perfect menu is crucial for your romantic dinner evening. The right mix of flavours and dishes creates an unforgettable experience.

When you’re planning, think about your partner’s favourite cuisines; it shows that you have put thought and care into it. From starters to dessert, each course should work together to create a harmonious food pairing that tickles the taste buds.

Whether you opt for classic romantic recipes or try something new, careful planning ensures that you both enjoy a delightful meal together.

Factors to Consider

When you’re selecting your menu, there are a few key factors that can shape the dining experience. Firstly, consider the cooking time and complexity of your dishes. You certainly want to avoid any last-minute panicking in the kitchen. Think about how the flavours and textures will work together throughout the meal, ensuring your starters, main courses, and desserts complement each other perfectly. And don’t overlook beverages; the right wine or drinks can elevate your meal and create a cosy atmosphere.

For instance, if you’re planning a romantic dinner, starting with visually appealing starters can set the mood from the outset. Mixing up flavours, like a creamy bruschetta and a zesty caprese salad, can create an inviting taste experience. For the main course, lighter proteins like grilled salmon or herb-crusted chicken cook quickly and leave room for some delightful sides. And let’s not forget dessert—something like a velvety chocolate mousse can leave a lasting impression.

So, each menu part should resonate with that romantic vibe while ensuring everything flows seamlessly together.

Cooking and Plating the Meal

Cooking and plating the meal is where your culinary skills shine, turning simple ingredients into a delightful dining experience. How you present your dishes can significantly affect how much your partner enjoys the meal, so it’s worth paying attention to plating and arrangement.

Use vibrant colours and interesting textures to create an inviting spread that looks as delicious as it tastes. And don’t forget about timing—make sure everything is served hot and fresh.

Tips for a Delicious and Beautiful Presentation

Several tips can elevate your culinary creations with a delicious and visually stunning presentation. Start by picking a colour palette that matches the theme of your dinner night; vibrant colours can make your dishes look more appetising.

Pay attention to proportions and serving sizes to create a balanced plate that’s easy on the eyes. Timing is key when serving your meal, so make sure each dish arrives fresh and warm to enhance the whole dining experience.

Think about adding contrasting textures alongside those carefully chosen colours—it adds depth and intrigue to your plate. Garnishes like fresh herbs or edible flowers can really boost the appeal, creating an inviting vibe that encourages your guests to dig in.

Arranging the food in an organised yet playful way can showcase the freshness and quality of your ingredients, highlighting just how delicious everything is. Remember, the art of food arrangement is just as crucial as the cooking itself. You want each dish to be a feast for taste buds and the eyes!

Adding Special Touches

Adding those special touches to your romantic dinner evening can transform the experience, making it more intimate and showing your partner just how much you care. Consider personalised details like handwritten notes, unique décor, or a romantic playlist. These little things turn a simple meal into a memorable experience.

They can evoke emotions and strengthen your bond, making the evening feel even more special. Consider surprising your partner with small gestures reflecting their interests and preferences to elevate the atmosphere.

Personalised Details to Impress Your Partner

Incorporating personalised details can wow your partner and make your romantic dinner memorable. Think about custom menu cards featuring their favourite dishes or engaging in fun couple activities during the meal—these thoughtful touches create a unique experience.

You might also want to include conversation starters based on your favourite moments together or even playful couple’s games that spark memories of your early dates or future dreams. These romantic gestures enrich the evening and transform a simple meal into an extraordinary event, deepening your connection through meaningful dialogue and fun.

With all these elements combined, you can ensure that the night is not only delightful but also a cherished memory for both of you.

How to Deep Clean Your Mattress for a Healthier Sleep

A clean mattress is crucial for a good night’s sleep and well-being. Let’s discuss why it’s important to keep your mattress clean, how a dirty mattress can affect your sleep, and the common signs that show your mattress is in dire need of cleaning.

We’ll also walk you through giving your mattress a deep clean. We’ll cover everything from gathering the necessary supplies, vacuuming, tackling stains, deodorising, and disinfecting. By following these steps, you’ll have a fresher and healthier mattress to help you get a better night’s sleep.

The Importance of a Clean Mattress

Keep your mattress clean to create a healthier sleep space and boost overall sleep quality. Regularly giving your mattress a deep clean improves your sleep hygiene and removes allergens that can mess with your health.

The Importance of a Clean Mattress

Impact on Sleep Quality and Health

The cleanliness of your mattress has a significant impact on your sleep quality and overall health. You should keep high cleanliness standards and develop healthy sleep habits to improve your health. This will help you avoid allergies and get a good night’s sleep.

To keep your mattress clean, make sure to:

  • Change and wash your bedding regularly
  • Use mattress protectors
  • Vacuum your mattress to remove dust mites, allergens, and other debris that build up over time.

To optimise your sleep environment, it’s also important to have proper ventilation in your bedroom, maintain a comfortable room temperature, and choose a quality mattress that matches your sleeping preferences.

Incorporate these practices into your bedtime routine to create a clean and cosy sleep sanctuary. This will help you get better rest and improve your overall well-being.

Signs that Your Mattress Needs Cleaning

Signs that Your Mattress Needs Cleaning

If you start noticing signs that your mattress needs a good cleaning, it’s time to take action for a healthier sleeping environment. Whether you’re smelling something funkyseeing stains, or suspecting dust mites, being alert to these signals means it’s time to break out the cleaning supplies.

Common Indicators of a Dirty Mattress

If you start noticing mattress stains, dust piling up, your mattress losing that fresh scent, and your bedding looking like it needs a good spin, chances are your mattress is due for a clean-up. It’s time to roll up your sleeves and tackle these issues head-on to create a cleaner and fresher sleeping environment for yourself.

Those stains on your mattress can be a real eyesore, right? Whether from sweat, spills, or accidents, they do not favour your sleep space. A simple mixture of bicarbonate soda and water can remove those pesky stains. And don’t forget about the dust—regular vacuuming can kick those dust mites and allergens to the kerb. Plus, rotating your bedding now and then can prevent uneven wear and tear, helping your mattress last longer.

Want your mattress to smell like a dream? Sprinkling some bicarbonate of soda and lavender essential oil will give it a delightful scent boost. Your mattress will thank you for it!

Step-by-Step Guide to Deep Clean Your Mattress

  1. Start by vacuuming to remove debris.
  2. Treat any stains with bicarbonate of soda.
  3. Bring out the steam cleaner for a deep clean.
  4. Finish off with an antibacterial spray for good measure.

Stick to this guide, and you’ll have your mattress spick and span in no time.

Gather Supplies and Remove Bedding

Before you delve into the deep cleaning, ensure you have all the necessary supplies – like a mattress protector, fresh sheets, and the right cleaning products. It’s time to remove all the bedding from your mattress, including pillows and other extras. Give everything a good shake to remove dust or debris, then vacuum the mattress surface thoroughly. If you notice any stains, treat them with a suitable cleaner following the manufacturer’s instructions. Allow the pre-treatment to work magic for the recommended time to tackle those stains effectively.

Vacuum and Spot Clean Stains

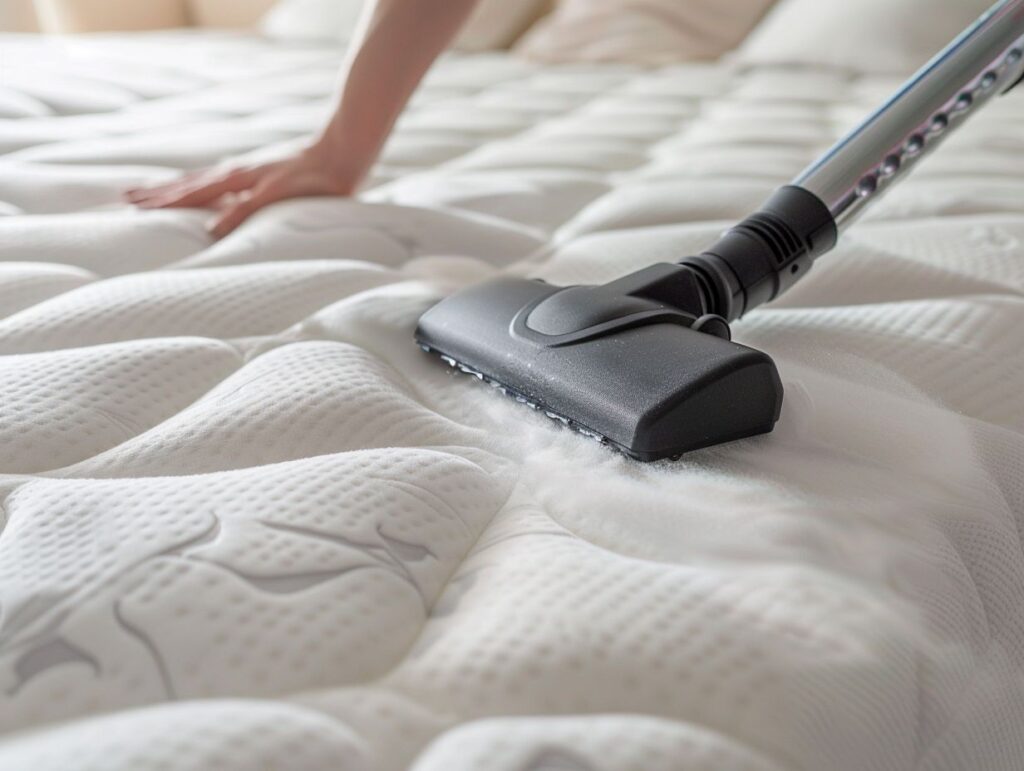
In terms of keeping your mattress fresh and clean, grab your trusty hoover to suck up all that dust and debris hanging out on the surface. It’s like giving your mattress a spa day to ensure you get quality zeds.

Remember to use the upholstery attachment on your hoover for a deep cleaning session. Start by hoovering every inch of your mattress, focusing on those seams and nooks where dust loves to hide. Once you’ve banished the dust bunnies, tackle any stains immediately with a gentle upholstery cleaner or a mix of water and mild detergent. Remember, pat those stains gently—don’t scrub unless you want them to move in permanently.

Regular hoovering and quick stain clean-ups not only extend the lifespan of your mattress but also create a dreamier sleeping space for you.

Deodorize and Disinfect

When you want to freshen up your mattress, use essential oils and deep cleaning solutions to give it a complete makeover. These steps are crucial to creating a genuinely rejuvenated sleep surface. By following these practices, you’ll be able to get rid of any lingering odours and germs, making your sleeping environment healthier.

Consider using essential oils like lavender, tea tree, or eucalyptus for a naturally fragrant touch that packs a punch against bacteria. These oils can help neutralise unwanted smells and microbial nasties on your mattress. Pair them with a deep cleaning solution made from water, vinegar, and baking soda, and you’ll not only freshen up your mattress but also kick out any dust mites, bacteria, or allergens lurking around.

This two-pronged approach ensures that your sleeping space is clean and hygienic, setting the stage for better sleep quality and overall well-being. Give your mattress some love and watch as your sleep experience upgrades!

Step-by-Step Guide to Deep Clean Your Mattress

Tips for Maintaining a Clean Mattress

Follow some simple tricks to keep your mattress clean and make it last longer. Pay attention to bed hygiene and use protective measures. Set up a regular cleaning routine to ensure your mattress stays fresh and in good condition. These tips will help create a healthier environment for a good night’s sleep.

Preventative Measures for a Healthier Sleep Environment

Remember to incorporate some preventive measures into your routine to get better sleep. Try rotating your bedding regularly, letting your mattress soak up sunlight for a natural clean, and sticking to a consistent sleep schedule.

These little habits can level up your sleep game and give you the support you need for quality rest. Don’t forget about the bedroom environment too. Ensure good ventilation, keep those electronic gadgets away before bedtime to avoid that pesky blue light, and set up a chill bedtime routine.

These simple yet powerful strategies can help you create the perfect setting for deep, restorative sleep. And we all know how crucial that is for your physical health, mental well-being, and overall productivity. So, give these tricks a shot and see how they work wonders for your sleep!

Enjoy a Cleaner and Healthier Mattress for Better Sleep

By following effective cleaning methods and maintenance tips, you can enjoy the benefits of a cleaner, healthier mattress that promotes better sleep. When you embrace a freshly scented mattress, you create a cosy and inviting environment for a restful night’s sleep. As you immerse yourself in that comforting aroma, you may find that your mind and body naturally relax, paving the way for deeper and more rejuvenating slumber. With each night you spend on a well-maintained mattress, you give yourself the gift of waking up feeling refreshed and rejuvenated, ready to tackle the day ahead with renewed energy and vitality. Prioritising a hygienic sleep environment supports your physical health and nourishes your mental well-being, contributing to a more balanced and harmonious overall lifestyle.

Do You Need Deep Or Regular Cleaning?

Before calling a cleaning company to request a cleaning service, you need to know the differences between deep cleaning and standard cleaning, as they are different.

What makes standard cleaning different?

Once you request a service and choose regular cleaning, the service you receive consists of simple cleaning tasks. Standard cleaning services usually cost less. But routine cleaning focuses on maintaining the layout of your home or office and is based on a schedule. The schedule varies depending on your needs. For example, an office building may need cleaning only once every two weeks or months.
Some of the things that standard cleaning involves are:

  • Dusting surfaces – this includes all lighting, windows and appliances.
  • Cleaning and disinfection of bathrooms, office premises, rooms, etc.
  • Removal of unwanted bacteria from surfaces prone to moisture accumulation.

What distinguishes deep cleaning?

Deep cleaning pays more attention to detail than standard cleaning. The cleaners will complete a more extensive list of tasks performed with a commercial building or home to keep the environment clean for workers and families during deep cleaning,

While doing deep cleaning, professional cleaners focus on wiping each surface twice and ensure that they have disinfected everything within walking distance and hand grips. Remember that deep cleanings cost more, but they also pay more attention to cleaning details than standard cleaning procedures.

When should you perform deep clean?

Each situation is unique, and the best time to thoroughly clean is when a new season begins. We recommend doing a deep cleaning once every six months to a year.

Three weeks ago, our friends’ family called us to say they would come and see us. Since they lived in another city, we were glad that their arrival was an occasion to have fun and talk. But, the problem was that our home needed to be in better shape. The children, two boys aged 5 and 10, were scattering toys everywhere, there was food in the rooms, dust on the furniture surfaces, and the bathroom also needed attention. This mess made me worried. But we had to act immediately, so I quickly made a list of things we had to do and included everyone at home to do whatever they could.

To avoid wasting your time, I will give you 14 ways to clean your home when you are expecting surprising guests quickly:

  1. Focus only on key places in your home.
    Decide which rooms you are more likely to spend some time with guests. Often this will be the kitchen or living room, so focus on those rooms first. Close the doors of all other rooms. You don’t have to think about cleaning the whole house. It is unrealistic and can be overwhelming and exhausting, so you can’t even greet your guests.
  2. Get rid of the dishes and wipe the sink.
    The kitchen sink is the place that can make your whole kitchen look dirty and messy. Remove the dishes as one of your first tasks. If they are on the drying rack, place them in the cupboards. If you have a pile still waiting to be washed, put them in the dishwasher to hide them.
  3. Focus on the arrangement.
    Take a walk in the main rooms. If there are piles of things you don’t know where to put, take a box and put it in it. Leave it in one of the rooms that your guests will not enter.
  4. Empty the bins.
    Emptying the bin will take little time, but it makes a big difference. You don’t want your guests to notice a full or crowded basket. The empty basket makes the room look tidier and does not smell.
  5. Open the windows.
    Where possible, open the windows while cleaning. That will make the air in the room fresher when your guests come.
  6. Wipe all surfaces.
    Wipe kitchen counter tops and tables by polishing them with a microfibre cloth until you are free of dirt, food and dust. It is the only way to give the room a feeling that everything is clean.
  7. Don’t forget the toilet.
    You must clean the toilet before your guests arrive by putting a cleaning gel in the toilet bowl and wiping it with disposable towels or a cloth specially designed for this purpose. If you have more than one toilet, focus on one and ensure your guests are directed to the cleaned toilet if they have to go.
  8. Dust.
    You can use a clothes roller on which the dust sticks quickly to remove the accumulated ones in the visible areas. Use this trick when you run out of time.
  9. Clean only one room at a time.
    Although you want to clean several rooms simultaneously, this is only sometimes an effective solution. You will lose a lot of valuable time.
  10. Light a candle.
    Light a scented candle before your guests arrive. That will make your room smell fantastic. And will also provide a friendly and relaxed atmosphere in your home.
  11. Change your clothes.
    After cleaning, change into clean clothes. If you are in a hurry, you may be sweating. Changing clothes will also help you feel fresher when your guests arrive, and they will need to realise that you have cleaned.
  12. Don’t apologise for the mess.
    Sometimes it is a habit to immediately apologise for the mess when your guests don’t even think your house is messy. The apology will draw more attention to the topic, and they are more likely to notice imperfections in cleanliness and order.
  13. Use your outdoor space
    Weather permitting, direct your guests to the garden or outdoor seating area. Take them outside if it is sunny to enjoy the sun. It has the added benefit for you and your guests. They will only spend as much time indoors, and they will not notice the uncleaned areas in your home.
  14. Distract guests with music, TV and food.
    Providing your guests with music to listen to, turning on the TV in the background or serving them a drink with a bit of food will help them relax, feel welcome, and distract them from looking around your room and apartment.

Here are some tips to keep you from panicking when you have unexpected guests. Follow them, and you will be able to welcome your guests in a hospitable and clean home with a calm and friendly smile.

Furniture Cleaning And Polishing

A growing number of households are relying on professional home cleaning, especially to restore the look of wooden furniture. Wood is a classic material for furniture for all rooms, attractive with its solidity and warmth. But for furniture to remain attractive, you must maintain it regularly.

What determines the cleaning of wooden furniture?

Maintenance is specific, depending on whether the furniture is made of natural wood, chipboard, or MDF.
In addition, it is vital whether the furniture’s surface is matte or glossy.
The third factor for the cleaning specifics is the wood’s colour, more precisely, whether it is light or dark. Lightwood is easier to contaminate and requires more time and effort to clean.
Fourth, it is crucial whether the surface of the wood is varnished.

How to keep your home furniture clean

Cleaning of varnished and unvarnished wood surfaces

If the furniture’s surface is varnished, clean it with a dry cloth. Microfibre towels are best.
Use a dry cloth to polish the furniture with unpainted surfaces, and here we recommend microfibre. It is important to clean solid wood furniture in the direction of the wood veins.
For lacquered surfaces, detergents are available. Use them rubbing in and then dry the surface. In the shops, you will also find detergents for cleaning unpainted wooden surfaces in the form of an emulsion. In addition to cleaning, they also polish and form a protective layer that prevents rapid contamination and dusting. If you find it difficult to cope, you can always use the services of cleaning companies, including furniture polishing.

Cleaning of light and dark wood

Use Vaseline or a mixture of vinegar and oil – one teaspoon each – to clean a light wood surface and erase minor scratches. To clean dark furniture, mix one teaspoon of red wine and oil.

Remove stains from wooden furniture

For removing the stains, it is important to know what kind of wood the surface is made of – whether it is hard or soft. Depending on the wood, there are different ways to remove the formed stains. For example, a soap and water solution for stains on MDF surfaces.

The stains of glasses on the table surface are very annoying. To remove them, use a mixture of butter and mayonnaise. One teaspoon mixed with a bit of cigarette ash.

Scratch erasure

If the scratches are light, you can remove them when cleaning with detergents. But over time, more visible scratches or cracks may appear in the wood. To remove them, use beeswax or Vaseline. After treating the surface, polish it with a soft cloth.

Easy tips for upholstered furniture maintenance

Tips for cleaning upholstered furniture at home

Upholstery cleaning is a must for any home. The convenience of this furniture is unquestionable. With the use, upholstery inevitably gets dirty. Cleaning homes with washing upholstered furniture is a good choice.
In the meantime, you can take care of your home’s upholstery with home remedies or using store detergents. This way, the dirt will not accumulate, and the periodic cleaning will be faster and easier.

Specialised cleaning products

It is easiest to buy a special preparation for upholstered furniture from a speciality shop, and you can also find one in the supermarkets. But first, you need to check whether the product, even with the inscription “universal”, will not damage the upholstery material or change colour. Therefore, try on the side part, and if you make sure there is no damage risk, continue cleaning the entire upholstery.

Home cleaners – baking soda, vinegar

With a solution of baking soda, you can successfully clean light dirt. Dissolve a tablespoon of baking soda in a glass of warm water. Add a few tablespoons of vinegar. Once the mixture boils, start applying it to the upholstery. Then wait about 10 seconds, and soak up with a towel. Do not allow the solution to penetrate deeply. With a soda and vinegar solution, you can successfully clean any artificial upholstery.

Cleaning with washing powder

You will need some washing powder and warm water. Pour about 300 ml of warm water and ¼ cup of washing powder, and mix them well to dissolve them. Apply with a towel or sponge on the upholstery, and after about 10 seconds, soak. Finally, clean the solution with a damp cloth and then a dry one.

Drying the upholstery after home washing

We recommend that you dry the upholstery with a hairdryer after washing it at home with baking soda, vinegar, or washing powder so that the solution does not penetrate deep inside.

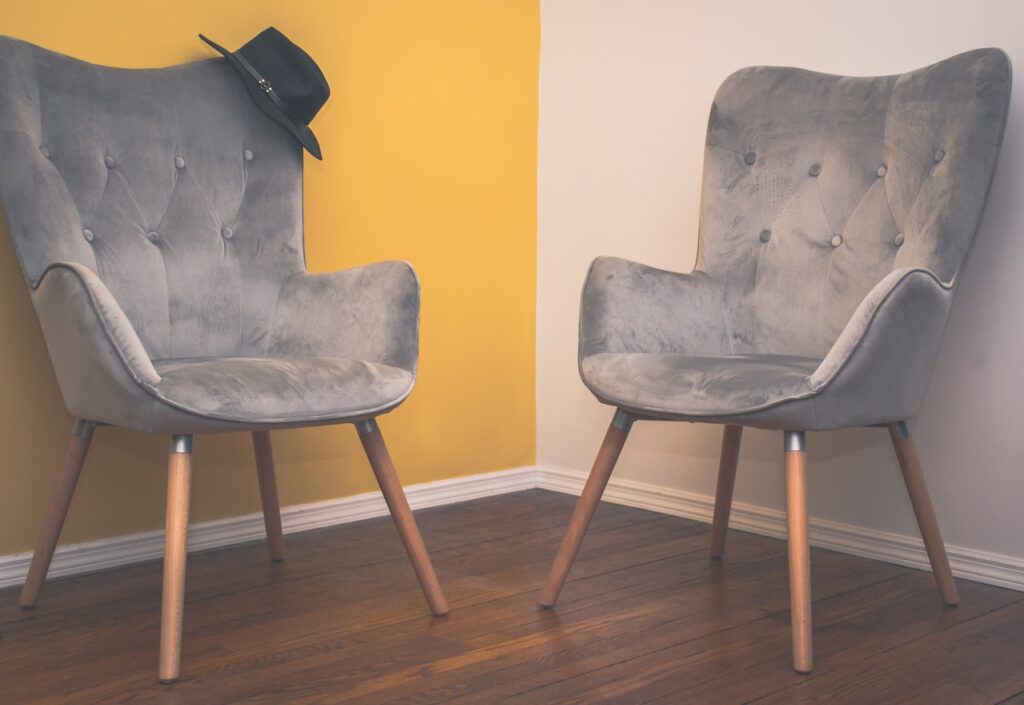
Suede or velvet upholstery

You can use a solution of water and ammonia to clean such upholstery. Dissolve two tablespoons of ammonia in a litre of cold water. Rub the upholstery with a cloth dipped in the solution and leave it on for about an hour. Then brush with a soft brush and blow-dry.

Risks when cleaning upholstery at home

Washing upholstered furniture at home can cause mould to grow inside and damage the upholstery itself. Consider whether it is worth doing it. Even a one-time cleaning of your upholstered furniture by a professional company is safer and easier. They have experience cleaning all kinds of upholstery and various cleaning products.

Top Three Summer Cleaning Challenges

Every season brings its own peculiar challenges, and summer is no different. And while all you may want to do is sit on the sofa in your comfy, air-conditioned living room, the chores always lurk in the background.

Here are the top three cleaning challenges you deal with during the summer months.

More dust

Over the last few years, summers have been scorching and dry, resulting in more dust in the air. Compared to the more humid spring and autumn months, you might want to reconsider the weekly vacuuming routine and pump it up at least two times. Also, more dust tends to accumulate on your windows, so we suggest you wash them at least once per month (or hire a professional to do it for you.)

More bugs

If you live near one of London’s great parks or open spaces, you cannot fail but notice the increase in insects flying around. They will stick to your window panes and sills, door frames, and the entire exterior of your house. Our suggestion – wait until late August or early September and then remove the dead bugs all at once.

More outdoor activities

Who doesn’t like the long summer evening walks? And what is more natural than your kids coming home with grass and dirt stains all over their T-shirts and shorts? Besides, we sweat much more during the summer, even if we just have to go for some groceries. 

Bottom line – prepare for significantly more laundry. The good thing is it will dry much faster in the heat!